Deploying IPFire in Microsoft Azure

This article has been composed from personal notes and documentation by using AI.
Microsoft Azure offers robust native tools like Azure Firewall, but these can sometimes come with a premium price tag that eats into your credits or budget. Enter IPFire, an open-source, Linux-based firewall distribution that’s not only powerful but also highly customizable. With features such as intrusion prevention, VPN capabilities, and zone-based traffic segregation, IPFire provides a viable alternative for those looking to optimize costs without sacrificing security.
We’ll delve into the process of installing and configuring IPFire on an Azure Virtual Machine (VM). By the end, you’ll have a firewall that uses a single public IP for external exposure, routes internal Azure resources via private IPs on a Virtual Network (VNet), and funnels all internet traffic through IPFire for centralized monitoring and control. We’ll also cover integrating a site-to-site (S2S) VPN to bridge your on-premises environment with Azure, creating a seamless hybrid cloud setup.
This approach is particularly appealing for small to medium-sized enterprises (SMEs), developers, or hobbyists who want enterprise-grade firewalling on a shoestring budget. However, it’s worth noting that while IPFire is free, Azure charges still apply for VMs, storage, and data transfer – though this can be more economical than Azure Firewall for lighter workloads.
Why Choose IPFire Over Azure Firewall?
- Cost Savings: Azure Firewall is billed per deployment and data processed, whereas IPFire runs on a standard VM, allowing you to scale down to smaller instances.
- Customization: IPFire’s modular add-ons (e.g., for proxying, URL filtering, or QoS) offer flexibility not always available in managed services.
- Learning Opportunity: Hands-on configuration builds deeper networking knowledge.
- Drawbacks to Consider: It requires more manual management, and Azure’s SLAs don’t cover custom firewalls, so redundancy planning is essential.
Prerequisites:
- A Windows workstation with Hyper-V enabled (for local VM prep, as Azure lacks direct ISO support).
- An active Azure subscription with sufficient credits.
- Basic knowledge of networking concepts like subnets, routing, and VPNs.
- The latest IPFire ISO downloaded from the official site: https://www.ipfire.org/download.
- Familiarity with the Azure portal; if not, Azure’s free learning paths are a great start.
Understanding the Architecture: Zones, Routing, and Security in IPFire
Before diving into the steps, let’s break down the core concepts. IPFire uses a “zone” system to compartmentalize network traffic:
- RED Zone: The untrusted, internet-facing interface. This handles inbound connections and outbound internet access.
- GREEN Zone: The trusted internal network, protecting your Azure VMs and resources.
- Additional zones like BLUE (Wi-Fi) or ORANGE (DMZ) can be added later, but we’ll stick to basics here.
In Azure, we’ll map these to VNet subnets, use user-defined routes (UDRs) to force traffic through IPFire, and leverage Network Security Groups (NSGs) as a secondary defense layer. This setup ensures all GREEN resources route via IPFire for firewalling, NAT, and logging, preventing direct internet bypasses that could expose vulnerabilities.
Step 1: Preparing the IPFire Image On-Premises with Hyper-V
Azure’s VM creation process doesn’t support booting from ISOs directly, so we prepare the image locally. This step is crucial because it allows us to configure IPFire’s initial settings, which are otherwise inaccessible in Azure due to limited console options (Azure Serial Console isn’t ideal for interactive setups).
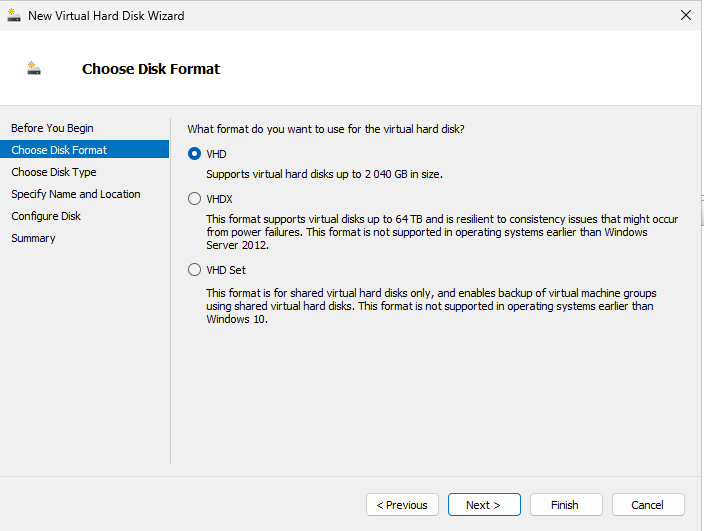
- Creating the Virtual Hard Disk (VHD):
- Launch Hyper-V Manager on your Windows machine.
- Generate a fixed-size VHD of 16 GB. Why fixed? It uploads more efficiently to Azure, and variable sizes can lead to unexpected storage bloat. 16 GB strikes a balance: enough for IPFire’s core (about 1-2 GB installed) plus logs and add-ons, without wasting space.
- Tip: Use PowerShell for automation
New-VHD -Path C:\IPFire.vhd -Fixed -SizeBytes 16GBto ensure consistency.
- Configuring the Hyper-V VM:
- Create a new Generation 2 VM (Gen2 supports UEFI, which aligns with modern Linux distros like IPFire for better performance and security features).
- Attach the VHD as the primary disk.
- Add two virtual NICs: These represent RED and GREEN zones. No need to connect them yet; we’re just building the image.

- Disable Secure Boot in VM settings (under Firmware). Secure Boot enforces signed kernels, but IPFire’s ISO might not comply, causing boot failures.

- Mount the IPFire ISO to the virtual DVD drive.
- Allocate modest resources: 1-2 vCPUs and 1-2 GB RAM suffice for setup.
- Installing IPFire:
- Power on the VM and boot from the ISO (adjust boot order if needed).
- Follow the installer: Select language, keyboard, and partition the VHD (use defaults for simplicity). The installation copies files and sets up the bootloader, taking just a few minutes.
- Initial IPFire Configuration:
- Post-install, the configuration wizard launches. This is a one-time opportunity in this context, so get it right.
- GREEN Zone Setup: Assign to the second NIC. Define your internal subnet (e.g., 10.10.10.0/24, mask 255.255.255.0). IPFire will claim an IP here (e.g., 10.10.10.5) as the gateway. This zone acts as your LAN router in Azure.

- RED Zone Setup: Set to DHCP client mode – Azure will assign an IP dynamically. Set MTU to 1400 to mitigate packet fragmentation in virtualized networks, which can cause performance drops or connection issues. Add a hostname for easier identification in Azure logs.

- Complete other prompts (e.g., admin password, DNS) – keep defaults unless you have specific needs.
- Why pre-configure? Azure VMs boot straight into the OS; missing this means redeploying or hacking console access.
- Exporting the VHD:
- After reboot, the VM may hang due to unconnected NICs – normal behavior.
- Shut down gracefully.
- Export the VM via Hyper-V (right-click > Export). Locate the VHD in the export folder – this is your golden image.

- Pro Tip: Verify the VHD with tools like chkdsk to ensure no corruption before upload.
Step 2: Uploading the Image to Azure Storage
Azure uses Blob storage as a scalable, durable repository for VM images. Uploading here allows conversion to a Managed Disk, which offers benefits like automatic replication and easier attachment.
- Setting Up Azure Resources:
- In the Azure portal, create a Resource Group (e.g., “IPFire-RG”). This containers all related assets, simplifying deletion or cost tracking.
- Add a Storage Account (general-purpose v2 for flexibility) and a Blob Container (private access to secure your image).
- Choose a region close to your operations for low latency.
- Uploading the VHD:
- Navigate to the Blob Container and upload the VHD. Use AzCopy or the portal uploader for large files.
- Monitor upload progress; compress if needed, but VHDs are already efficient.
- Common Pitfall: Ensure the VHD is not in use close Hyper-V to avoid locks.

Step 3: Building the Virtual Network Infrastructure
VNets are Azure’s software-defined networks, providing isolation similar to on-premises VLANs. Subnets further segment for security and organization.
- Creating the VNet:
- Define an address space like 10.10.0.0/16 (65,536 IPs – room for growth without CIDR conflicts).
- Enable DDoS protection if in a high-risk environment.

- Defining Subnets:
- RED: 10.10.1.0/24 (254 usable IPs) for external exposure.
- GREEN: 10.10.10.0/24, matching your IPFire config.

- Why separate? It enforces zone isolation; traffic between subnets routes through IPFire.
- Tip: Plan for expansion – add more subnets later for BLUE/ORANGE zones.
Step 4: Provisioning the Managed Disk and VM
Managed Disks abstract storage management, providing IOPS guarantees and encryption options.
- Creating the Managed Disk:
- Search for “Disks” > Create.
- Source: Storage Blob – select your uploaded VHD.
- OS: Linux, Generation: 2.
- Size: 16 GB, Tier: Standard SSD (cost-effective; upgrade to Premium for high-traffic firewalls).
- Encryption: Enable for compliance.

- Deploying the VM:
- From the disk overview, click “Create VM” (or manually create and attach).

- Size: Start small (e.g., B1s – 1 vCPU, 1 GB RAM) and scale as needed.
- Networking: Add two NICs – RED to RED subnet with public IP (static for reliability), GREEN to GREEN subnet (private IP).
- No OS credentials needed; IPFire uses its own auth.
- From the disk overview, click “Create VM” (or manually create and attach).
Step 5: Implementing Routing and Security Controls
Without custom routing, Azure defaults to system routes, potentially bypassing your firewall.
- Configuring User-Defined Routes (UDR):
- Create a Route Table.
- Add route: Prefix 0.0.0.0/0 (all traffic), Next Hop: Virtual Appliance, Address: IPFire’s GREEN IP (e.g., 10.10.10.5).
- Associate with GREEN subnet.
- This “hairpins” traffic through IPFire, enabling NAT, filtering, and internet egress control.
- Troubleshooting: If routes fail, check for conflicts with Azure’s implicit rules.

- Setting Up Network Security Groups (NSGs):
- Assign to RED NIC/subnet.
- Rules: Allow Any/Any initially, IPFire is your primary firewall.
- For paranoia, add inbound rules only for needed ports (e.g., VPN), but duplicate in IPFire.
- NSGs provide Azure-level logging; use them for auditing.

Step 6: Launching and Accessing IPFire
Booting in Azure integrates the VM into your VNet.
- Powering On the VM:
- Start via portal. Monitor serial console for boot logs – IPFire should grab DHCP on RED.
- Gaining Initial Access:
- IPFire locks web UI (port 444) to GREEN for security.
- Spin up a temporary Windows VM in GREEN (e.g., Standard_B1s, public IP for RDP).
- RDP in, then browse to https://10.10.10.5:444 or SSH.
- Cost: Negligible for 5-10 minutes; delete after.

- Enabling External Management:
- In IPFire UI (System > Firewall Rules), add a rule: Source your IP, Destination IPFire, Port 444/TCP.
- Access now via https://<public_IP>:444.
- Security Note: Use IP restrictions or VPN; avoid “Any” source.

Step 7: Enhancing with VPN Capabilities
VPNs turn your firewall into a secure gateway.
- WireGuard for Remote Access: In IPFire UI (Network > VPN), set up WireGuard. Generate keys, configure clients. Ideal for admins with dynamic IPs – fast, modern encryption.
- Site-to-Site VPN: Use IPsec or OpenVPN for on-premises links. Match endpoints (e.g., your router’s public IP to Azure’s). This creates a tunnel for private resource access, reducing public exposure.
- Benefits: Encrypted traffic, no need for multiple public IPs.
- Tip: Test with ping/traceroute; monitor IPFire logs for errors.
Troubleshooting and Best Practices
- Common Issues: VM won’t boot? Check VHD integrity or Gen2 compatibility. No internet? Verify routes and DHCP.
- Optimization: Enable IPFire add-ons like Suricata for IDS. Use Azure Monitor for VM metrics.
- Security Hardening: Regularly update IPFire (via UI). Implement failover with Availability Sets.
- Cost Management: Use Azure Cost Analysis; shut down temp VMs promptly.
- Scaling: For production, add load balancers or multiple IPFire instances.
Conclusion: Empowering Your Cloud Security Strategy
Deploying IPFire on Azure is about architecting a resilient, cost-aware security posture. By understanding zones, routing, and integrations, you’ve equipped yourself to handle hybrid environments with confidence. This setup saves credits, fosters learning, and scales with your needs. If challenges arise, community forums like IPFire’s wiki or Azure’s Q&A are invaluable.
Experiment, iterate, and secure your cloud journey. Questions or variations? Drop a comment below. I’d love to hear your experiences!